Monday, July 13, 2009

Use your own VB.Net and C# Libraries in VB6


There are times when you need to use one of your .Net DLL’s in a Visual Basic 6 application.

Why should I bother, you ask? Let’s say that you want to retrieve information from a .Net Web Service from your VB6 app, it is easiest and fastest to code the call from a .Net Library than from VB6. Or you may have a Security Library that handles the user authentication and authorization of all the apps in your company, but you have some old VB6 programs that you can’t get rid of. In all these cases, it would be helpful to just invoke a method of your .Net Library from the VB6 code.

There is a series of requisites to make a .Net DLL usable from VB6.

1. Prepare your Class.

In your DLL, you should have a Main or Entry Point Class. That is the class that the VB6 app will call and use. It doesn’t matter what your other classes do, you just need to code the Main Class with these points in mind:

- Don’t use Shared or Static Functions. VB6 won’t be able to call these functions. As long as they are not been called from VB6, it doesn’t matter if you have Static functions in your code.

- Don’t user parameterized Constructors. To instantiate your class from VB6 there must be a default constructor (that doesn’t receive any parameters). Again, you can have all the constructors you want, but you will be able to use only the default from VB6.

- Add an Import (VB.Net) or Using (C#) to this namespace: System.Runtime.InteropServices


2. Prepare your DLL.

You have to change some settings to your project in order to make it usable from VB6:

- Sign the Assembly. Go to Project -> Properties and in the Signing Tab check the “Sign the Assembly” option. Then choose a strong name for your key file selecting “”, type a name and press OK (you don’t need to protect the key with a password)

- Make the Project COM Visible. Go to the Application tab in your project properties and click in “Assembly Information…” button. Check the option “Make assembly COM-Visible”. Now that you are here, fill the assembly information (product name, version, etc.) as this info will be displayed in VB6 when you reference to it.


- Make Intellisense work in VB6. You need to open the file AssemblyInfo.vb or AssemblyInfo.cs. You can open it from the Solution Explorer under the Properties folder. If you can’t see it, click the “Show All Files” button in the toolbar of the Solution Explorer. What you need is to add this line there (it could be anywhere in the file):

C#: [assembly: ClassInterface(ClassInterfaceType. AutoDual)]
VB.Net:


(If you have problems, you may come back here and change AutoDual to AutoDispatch)

- Add the path of the key.snk. In the AssemblyInfo file, add the path of the key you created previously:

C#: [assembly: AssemblyKeyFile(@"C:\...\MyKey.snk")]
VB.Net:


3. Prepare Client Machine.

When you build your project, you will notice Visual Studio generated two files: mydll.DLL and my dll.TLB. The second file is a description of the DLL used by VB6. In order to use the DLL from VB6 you need to register the assembly:

- First open a command prompt (Start -> Run -> “cmd”) and go to the .Net Framework directory:

> cd C:\WINDOWS\Microsoft.NET\Framework\v2.0.50727

- Now use the regasm command to register both DLL and TLB:

> regasm C:\[path]\MyDll.dll /tlb:MyDll.tlb

(If you need to uninstall the the .Net reference, use "regasm /u")

You will need to do this for your Development Machine and for the Client Machine. You can create an installer or a batch program to register the DLL and TLB in the client machine.

The last step is simple: open Visual Basic 6 Environment, go to Project -> References… and browse for your DLL.

Congratulations! Now you can instantiate your .Net Class from Visual Basic 6.

Friday, June 5, 2009

Developing with Visual Studio & Subversion (Part II)


In the previous post we covered the installation and configuration of CollabNet’s Subversion Sever. Now, we’ll see how to install the client and Visual Studio plugin.

Installing CollabNet’s Subversion Client.

1) Files you need: CollabNetSubversion-client-[version].win32.exe
Download it from: http://www.collab.net/downloads/subversion/
You are going to have to register, but it’s free and quick.
In fact, you can download both server and client version in the same package.

2) Run the CollabNet client installation file and follow the steps (you'll be prompt to select a Destination path).
3) You may need to add the environment variables:
Go to My Computer -> right click -> properties -> advance-> environment variables
Create a System variable called SVN_EDITOR as c:\windows\notepad.exe (can be other text editor)
Verify the System variable Path and check there is C:\Program Files\CollabNet Subversion Client (the destination path of the installation). If it is not there, add it.
4) That’s it! Now, you can access any subversion repository with the svn commands in a command prompt window. You only need the IP address, port and project name of your repository and a user and password with access to it.

Some useful svn commands are:

- ls. List the folders and files that a repository folder contains.
svn ls svn://ipaddress:port/myproject
- mkdir. Allows you to create a folder or project in a repository.
svn mkdir svn://ipaddress:port/myproject
- import. Lets you copy all the files in the current folder to a folder in the repository.
C:\[project path]> svn import svn://ipaddress:port/myproject
- checkout. Makes a copy of all the files in the repository folder and its subfolders to the current path. Locate the prompt in your workspace when executing this command.
C:\[workspace path]> svn checkout svn://ipaddress:port/myproject
- delete. Be careful with this one. It allows you to delete all the files and subfolders in your repository folder.
svn delete svn://ipaddress:port/myproject
- help. This one will assist you in the usage and syntax of other svn commands.
svn help [svn_command]

To look for more commands, I recommend you to go to this post.


Installing Subversion plugin for Visual Studio.

We’ll use AnkhSvn plugin from CollabNet in order to execute svn commands from the Visual Studio IDE.

1) Files you need:
AnkhSvn-[version].msi
Download it from: http://www.open.collab.net/products/desktops/getit.html
Select CollabNet Desktop - Visual Studio Edition v1.3 for Visual Studio 2005 or 2008

Microsoft WSE 3.0.msi
You also need Microsoft Web Services Enhancement 3.0 for Microsoft .NET
Download it from http://tinyurl.com/48cdk9

2) Install WSE 3.0, first. Just follow the steps.
3) Install AnkhSvn-[version].msi. Just follow the steps.
4) That’s it! Now, to test, open your Visual Studio and open an existing project.

Browsing the repository and Checking out a project.

5) Go to View->Repository Explorer
6) In the Repository Explorer, press Add a new URL to the Repository Explorer. Type the IP address and port of your repository. You may be prompt for your user name and password.
svn://[ip]:[port]


7) Select a folder in the tree and press Checkout from Subversion.
8) Now, just select a local folder where the files are going to be stored and press OK. You successfully checked out your code from Subversion using Visual Studio.

Adding a Project to Subversion.

9) In the Solution Explorer, right-click the solution or a project you want to add to Subversion.
10) Choose a project name, select a folder in the repository to store your solution (or create a new one) and you may check the Add trunk Folder to Project option.
11) Type a comment and that’s it!

Updating code, Committing and Reverting changes using the IDE.

You will notice the blue plus sign in each file of the solution. This means addition of files. You will see different symbols indicating that a files is equal to the repository version (green), that some changes has been made to the file and needs to commit (red), etc.

To commit a change you can right-click the file and select Commit or go to View-> Toolbars-> Source Control – Subversion to display the Pending changes window. Here you will see the summary of the changes made by you.

From this tool window, you can do almost everything with Subversion. You can Commit all or selected changes and Update your code to the recent version (in case someone else modified it). To undo a change you can right-click the file in the Solution Explorer and select Revert. That will rollback to the more recent version of the file.


So this is it for Subversion and Visual Studio. I hope it helps you and your team. CollabNet’s tools are very good, easy to install, and the best of all: they are free.

Thursday, June 4, 2009

Developing with Visual Studio & Subversion


A reliable Version Control System is important to every development team. Generally speaking, Java developers are very familiar with CVS and Subversion, but .Net developers often use Microsoft SourceSafe to manage their code. However, SourceSafe is pretty bad. I see SourceSafe as a source code backup system more than a version control system (doing that, it really makes justice to its name).

So when I tried to make the jump to Subversion, I encountered a couple of issues. Now I’m posting this Tutorial about how to implement Subversion in .Net developments, just in case you need it.

In this tutorial we are going to use CollabNet products: its Subversion Server and Client and AnkhSVN subversion plugin for Visual Studio. I will use Visual Studio 2005, but it works for 2008, too.

First thing to do: install the Subversion Server.

1) Files you need: CollabNetSubversion-server-[version].win32.exe
Download it from here: http://www.collab.net/downloads/subversion/
You are going to have to register, but it is free and quick.

2) Run collabNetSubversion installer and follow the steps.
You can use a server or just your local PC. It depends on the size of the team and the resources you have.

3) Select to install both components SVNSERVE and Apache (MOD_DAV_SVN) (Apache 2.2).

4) Select the port (default 3690, you may use this one) and a repository path (default c:\svn_repository) and select install svnserve to run as Windows Service.

5) Select Host for Apache (localhost or your IP) and host port (default 80, if IIS is installed or the port is already assigned select other, like 3128) and select install apache to run as windows service. Select the repository path for mod_dav_svn (the same as step 4) and the repository location prefix (default /svn). Enable viewVC is not necessary.

6) Select destination folder and click install.

Until this step, we already installed CollabNet’s Subversion Server, but we still have to do some configurations.

Configuring the Services

7) Open the Services tool (Administrative Tools->Services or Start->Run...->services.msc).
8) Look for Apache2.2 service and start the service.
9) Look for Subversion Server and start the service. You can see in the Properties of the service if the start up type is set to Automatic.


Setting Environment Variables

10) Go to My Computer -> right click -> properties -> advance-> environment variables.
11) Create a System variable called SVN_EDITOR as c:\windows\notepad.exe (or you can choose another text editor).
12) Verify the System variable Path and check there is C:\Program Files\CollabNet Subversion Server (the destination path of the installation). If it is not there, add it.

Creating the Repository

13) Open a Command Prompt.
14) type:
svnadmin create c:\svn_repository (the repository path you entered in the installation).
15) Navigate to c:\svn_repository and verify that a lot of files have been generated there.


Creating Users and Granting Access

16) Navigate to the c:\svn_repository\conf\svnserve.conf file and open it with notepad.
17) Uncomment (remove the # sign and the first blank space) the following lines:
[general]
anon-access = read
auth-access = write
password-db = passwd

18) The password-db variable is the file where the passwords are stored. Go there (c:\svn_repository\conf\passwd) and open it with notepad.
19) Uncomment (remove the # sign and the first blank space) the following lines:
[users] harry = harryssecret sally = sallyssecret
20) "harry" and "sally" are your user names with their passwords. You may delete them and create your own user names.

Creating a Project

21) Open a command prompt and type:
svn mkdir svn://ipaddress:port/myproject
Where "myproject" is the name of your project, "ipaddress" can be replaced with your IP address or "localhost" and "port" with the subversion server port.
22) Your notepad (or favorite text editor) will prompt you to add a comment. Add it, save it and close the window.
23) Now you'll be prompted for credentials. You may need to enter the password for your PC user account, then use harry or sally's username and password (or the ones you created).
24) Create the folders that by convention should be in a subversion project:
svn mkdir svn://ipaddress:port/myproject/trunk
svn mkdir svn://ipaddress:port/myproject/branches
svn mkdir svn://ipaddress:port/myproject/tags


25) Finally, to test that everything is OK, run this command:
svn ls svn://ipaddress:port/myproject


So far, you already set up a Subversion server, a repository with its users and a project.

In the next post we’ll see how to install and configure a Subversion client and a plugin for Visual Studio 2005.

Useful links about this topic:
-
http://blogs.vertigosoftware.com/teamsystem/archive/2006/01/16/Setting_up_a_Subversion_Server_under_Windows.aspx
-
http://aymanh.com/subversion-a-quick-tutorial

Wednesday, May 6, 2009

Comparing your objects: IComparable & IComparer Interfaces (Part III)

Now, here is a useful example of IComparable and ICompare. Let's bind a List of our Business Objects to a DataGridView and Sort the list by column when a header column is double-clicked.

Create a WinForms application. Let's start with a form with a button and a DataGridView.
The button will create a List of Employees (see the previous post) and populate it. After that, we'll bind the list to our datagrid:

private void btnLoad_Click(object sender, EventArgs e)

{

List<Employee> employees = new List<Employee>();

//add employees to the list

employees.Add(new Employee("1", "Elijah", "Baley", 5000.50));

employees.Add(new Employee("2", "Daneel", "Olivaw", 3650.80));

employees.Add(new Employee("3", "Hari", "Seldon", 8450.25));

//bind the datagrid

dgvEmployees.DataSource = employees;

}


If you run the app and click the button you will get something like this:


Let's get to the Sort part. Remember we created some Comparer classes for our Employee Class. However, those comparers will work only to sort in an Ascending order. Let's create more to sort in Descending order. The only change here is that we will compare the objects backwards:

In ascending order we compare like this:
x.property.CompareTo(y.property)
In descending order we just use:
y.property.CompareTo(x.property)

So here you have all the comparers we will use:

//ASCENDING

public class EmployeeComparerFirstName : IComparer<Employee>

{

public int Compare(Employee x, Employee y)

{

return x.FirstName.CompareTo(y.FirstName);

}

}

public class EmployeeComparerLastName : IComparer<Employee>

{

public int Compare(Employee x, Employee y)

{

return x.LastName.CompareTo(y.LastName);

}

}

public class EmployeeComparerSalary : IComparer<Employee>

{

public int Compare(Employee x, Employee y)

{

return x.Salary.CompareTo(y.Salary);

}

}

//DESCENDING

public class EmployeeComparerEmployeeIdDSC : IComparer<Employee>

{

public int Compare(Employee x, Employee y)

{

return y.EmployeeId.CompareTo(x.EmployeeId);

}

}

public class EmployeeComparerFirstNameDSC : IComparer<Employee>

{

public int Compare(Employee x, Employee y)

{

return y.FirstName.CompareTo(x.FirstName);

}

}

public class EmployeeComparerLastNameDSC : IComparer<Employee>

{

public int Compare(Employee x, Employee y)

{

return y.LastName.CompareTo(x.LastName);

}

}

public class EmployeeComparerSalaryDSC : IComparer<Employee>

{

public int Compare(Employee x, Employee y)

{

return y.Salary.CompareTo(x.Salary);

}

}


You may wonder why we have a desceding comparer for EmployeeId property but not the ascending one. That's because the ascending comparer for that property is the default comparer in our Employee Class when it implements IComparable. That's in the CompareTo method (see part I).

We can use any of this comparers to sort the columns of our datagrid, the problem is how to know which comparer should we use. To decide that we'll create a method that will return the right IComparer we need, based on the name of the property that column is bound to and the sort order.

private IComparer<Employee> getEmployeeComparer(String propertyName, System.Windows.Forms.SortOrder sortDirection)

{

switch (propertyName)

{

case "FirstName":

if (sortDirection == SortOrder.Ascending)

return new EmployeeComparerFirstName();

else

return new EmployeeComparerFirstNameDSC();

case "LastName":

if (sortDirection == SortOrder.Ascending)

return new EmployeeComparerLastName();

else

return new EmployeeComparerLastNameDSC();

case "Salary":

if (sortDirection == SortOrder.Ascending)

return new EmployeeComparerSalary();

else

return new EmployeeComparerSalaryDSC();

default:

if (sortDirection == SortOrder.Ascending)

return null;

else

return new EmployeeComparerEmployeeIdDSC();

}

}


You can see that if the property name is not found, the list will be sorted by EmployeeId. Additionally, if the sort order is ascending the method will return null. That's because if the Sort method of List receives no comparer at all, it'll use the default comparer of the object: the CompareTo method.

You can write this method in the Employee class making it static or in a different class with all the other comparers. For now let's just put it in the code of our Form.

The next step is to handle the event ColumnHeaderMouseDoubleClick of the DataGridView, so when the user double-clicks the header of a column we will sort that column.

private void dgvEmployees_ColumnHeaderMouseDoubleClick(object sender, DataGridViewCellMouseEventArgs e)

{

//get list from datasource

List<Employee> employees = (List<Employee>)dgvEmployees.DataSource;

//set sort order

SortOrder sortOrder = (dgvEmployees.Columns[e.ColumnIndex].HeaderCell.SortGlyphDirection == SortOrder.Ascending ? SortOrder.Descending : SortOrder.Ascending);

//sort list

employees.Sort(getEmployeeComparer(dgvEmployees.Columns[e.ColumnIndex].DataPropertyName, sortOrder));

//remove sort glyph from any other column

unmarkSortedColumns(dgvEmployees);

//set sort glyph for current column

dgvEmployees.Columns[e.ColumnIndex].HeaderCell.SortGlyphDirection = sortOrder;

//refresh grid to see the changes

dgvEmployees.Refresh();

}


Here is the big thing.
1) We cast the data source of the DataGridView to an Employee List.

List<Employee> employees = (List<Employee>)dgvEmployees.DataSource;


2) We decide the new sort order. If the column is already sorted with ascending order then we will sorted descending, else if the sort order is descending or the column is not sorted at all we will use ascending order.

SortOrder sortOrder = (dgvEmployees.Columns[e.ColumnIndex].HeaderCell.SortGlyphDirection == SortOrder.Ascending ? SortOrder.Descending : SortOrder.Ascending);


3) Now we sort the List (notice that we sort the List and not the DataGridView) using our GetEmployeeComparer method to get the right comparer we need. To do this we pass the sort order and the name of the property. To get the name of the property just look at the DataPropertyName attribute of the current column.

employees.Sort(getEmployeeComparer(dgvEmployees.Columns[e.ColumnIndex].DataPropertyName, sortOrder));


4) An additional step is to remove the sorted glyph to any other column that was previously sorted. To do this we write the function unmarkSortedColumns passsing the our DataGridView, this way we can reuse this method when sorting other grids.

private void unmarkSortedColumns(DataGridView dataGrid)

{

foreach (DataGridViewColumn col in dataGrid.Columns)

{

if (col.HeaderCell.SortGlyphDirection != SortOrder.None)

col.HeaderCell.SortGlyphDirection = SortOrder.None;

}

}


5) After that we set the sort glyph to the current column we are sorting. Remember that the SortGlyphDirection property or the HeaderCell of our column is the one that sets that arrow icon in the column header that indicates the column is sorted.

dgvEmployees.Columns[e.ColumnIndex].HeaderCell.SortGlyphDirection = sortOrder;


6) And the last thing, but not less important, is to refresh the DataGridView. Otherwise, how would it know that the List has been order?

dgvEmployees.Refresh();


And that's it for now, your DataGrid will be sorted by the column you double-click:


In conclusion: you can implement IComparable and IComparer to compare you business objects by some property or based on an algorithm. A practical usage of these interfaces is to sort a list of business objects and sort the columns of a DataGridView when it is bound to a list of business objects.

That's it for this serie of posts, however expect a surprise about topic. soon.

See Part I and Part II

Monday, May 4, 2009

Comparing your objects: IComparable & IComparer Interfaces (Part II)

In a previous post we saw that implementing the IComparable Interface allows an instance of our class to be compared against another object of the same type. We can choose a property of our class as the default criteria of comparison.

But what if we want to have multiple criteria for comparing objects? With IComparable we can have only one compareTo method, but IComparer helps us to compare objects using different criteria.

A big difference between these two Interfaces is that when our class implements IComparable it adds a compareTo method to our Class, but IComparer must be implemented in a different class. So we are going to have a Comparer class to help us compare our objects.

To illustrate the usage of the IComparer Interface, let's use the example of the previous post. This is our Employee class that implements IComparable and uses the EmployeeId property as the comparison criteria:

public class Employee : IComparable<Employee>

{

//Properties

private String employeeId;

public String EmployeeId

{

get { return employeeId; }

set { employeeId = value; }

}

private String firstName;

public String FirstName

{

get { return firstName; }

set { firstName = value; }

}

private String lastName;

public String LastName

{

get { return lastName; }

set { lastName = value; }

}

private Double salary;

public Double Salary

{

get { return salary; }

set { salary = value; }

}

//Constructor

public Employee(String id, String firstName, String lastName, Double salary)

{

this.employeeId = id;

this.firstName = firstName;

this.lastName = lastName;

this.salary = salary;

}

//IComparable

#region IComparable Members

int IComparable<Employee>.CompareTo(Employee other)

{

return this.EmployeeId.CompareTo(other.EmployeeId);

}

#endregion

}


Now, we'll create a Comparer class to compare Employee objects using the FirstName property.

public class EmployeeComparerFirstName : IComparer<Employee>

{

public int Compare(Employee x, Employee y)

{

return x.FirstName.CompareTo(y.FirstName);

}

}


We are using the Generic version of the Interface but you can use the other one (see in Part I how to do it).

And this way, you can create a Comparer class for each property of your class, or even code an algorithm inside the Compare method. For now, let's create another Comparer for the salary:

public class EmployeeComparerSalary : IComparer<Employee>

{

public int Compare(Employee x, Employee y)

{

return x.Salary.CompareTo(y.Salary);

}

}


So, comparing your objects is simple. But what is the purpose? Here is an example of using IComparer and IComparable to sort a List of Employees:

class Program

{

static void Main(string[] args)

{

List<Employee> employees = new List<Employee>();

//add employees to the list

employees.Add(new Employee("1", "Elijah", "Baley", 5000.50));

employees.Add(new Employee("2", "Daneel", "Olivaw", 3650.80));

employees.Add(new Employee("3", "Hari", "Seldon", 8450.25));

printList(employees);

//sort by first name

employees.Sort(new EmployeeComparerFirstName());

printList(employees);

//sort by salary

employees.Sort(new EmployeeComparerSalary());

printList(employees);

//sort by the default field: employee ID

employees.Sort();

printList(employees);

Console.ReadKey();

}

//method to print the list

static void printList(List<Employee> list)

{

foreach (Employee employee in list)

{

Console.WriteLine(employee.EmployeeId + " " + employee.FirstName + " " +

employee.LastName + " " + employee.Salary.ToString());

}

Console.WriteLine("------------------------------------");

}

}


It's a console application that creates a List of Employees and sorts it using our comparers. The Sort method of List of Employees receives either a Comparer or nothing at all (in an overloaded version of the method). If you don't provide a Comparer, the Sort method will use the compareTo method of the class.

Run it and see it for yourself. Play with it. You can notice that if Employees does Not implements IComparable and you don't provide a Comparer when sorting the list, you will get an exception because the Sort method doesn't know how to compare the employees.

Another point is that if your are using a Generic List (like in the example) you have to use the Generic versions of IComparer and IComparable (to know how to use the non-generic versions go to the previous post).

A really good usage of Comparers is when you bind your List of objects to a Control and want to use the Sort functionality of the Control. In the next post we'll see how to sort a DataGridView in WinForms when it is bound to a List of business objects.

Tuesday, April 21, 2009

And now, what??

Did something like this ever happen to you?

I was working with Visual Studio 2005 and suddenly it stopped responding. I tried to kill the process with the Task Manager after a while and Task Manager stopped responding, too!!!
Everything else in Windows kept working perfectly with the exception of Visual Studio and Task Manager.

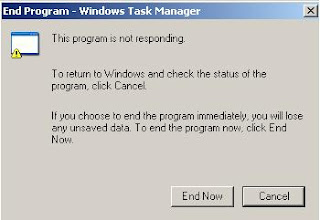
Back to the question in the title... Now What?? If everybody knows that to kill a non responding application you use the task manager, what do you do when task manager doesn't respond? To be true, it had never happen to me before.

So, the next logical step was to try to close the task manager....

and after clicking End Now...

Of course it didn't work.

The scary thing here is that the only application I thought unbreakable in Windows is just another mortal application; but then again... it's Windows, I shouldn't get surprised.

By the way, the solution is to restart the PC. Is there anything that a good restart can't fix?

Monday, April 20, 2009

Comparing your objects: IComparable & IComparer Interfaces.

Have you ever try to make your objects “Sortables”? Some WinForms controls have sort functionality when you bind them to a DataTable or other DataSources; one of those is the DataGridView. However, when you bind them to a list of your own business objects, sorting it’s not completely automatic.

That's when Comparing Objects enters to scene.

To sort a list of values (or objects), the control needs to know how to compare them. The interfaces IComparable and IComparer are provided for this goal.


When implementing the IComparable interface, we are saying that a specific instance of the class can be compared to another one.

Let’s say we have an Employee class:

class Employee : IComparable

{

private String employeeId;

private String firstName;

private String lastName;
private Double salary;

}

(You may use properties of the class. For simplicity we’ll use fields)

We can implement the inteface IComparable; the IDE will help us to generate the functions of the interface by putting the cursor in the name of the inteface and clicking “Implement Interface”.


I like the explicitly way, but it’s a matter of taste (or company standards)

class Employee : IComparable<Employee>

{

private String employeeId;

private String firstName;

private String lastName;

private Double salary;


#region IComparable Members

int IComparable.CompareTo(Object obj)
{


}

#endregion

}


Now you just have to decide how you are comparing the Employees. When you say EmployeeA > EmployeeB, how the employees should be compared? Employee A is greatest than B because of his salary? Let’s say that the default comparison will be the employee ID in order to don’t hurt anyone’s feelings.

int IComparable.CompareTo(Object obj)
{

this.employeeId.CompareTo(((Employee)obj).employeeId);

}


We are comparing the employee ID of our object against the employee ID of the object received as parameter in the function.

Here we have two things to point out:
A) We are using the CompareTo method of the String Class; after all, employee ID is a String; and
B) We have to cast the object received as an Employee.

Point A is not an issue. Usually, we are going to have an ID or some identifier property in our class to compare against it. This ID will often be a String, int, DateTime or some sort of base type. The good news is that all of these types implements IComparable, so they have the CompareTo method. But if you need to use a non-IComparable property or need a whole specific algorithm to compare two objects, you can change the CompareTo method to fit your needs. The only thing you have to remember is to return an integer representing if the instance is less, equal or greater than the parameter.

Instance < Object returns a value less than zero
Instance == Object returns zero
Instance > Object returns a value grater than zero

Now, the real problem comes with point B. What if we received an object that is not an Employee? We would have an Exception in that case. So, in order to fix that, we’ll use the Generic version of the IComparable interface that allows only objects of the specified typed.


class Employee : IComparable<Employee>

{

private String employeeId;

private String firstName;

private String lastName;

private Double salary;


#region IComparable Members

int IComparable<Employee>.CompareTo(Employee other)
{

this.employeeId.CompareTo(other.employeeId);

}

#endregion

}


Now we are sure we are comparing two Employees.

This is it for IComparable Inteface. In a (near) future post we'll see the IComparer Interface, the differences between these two and an example of using them.

Thursday, April 16, 2009

Hola Mundo!

Bienvenidos a AlienPeople!

Somos tres desarrolladores que trabajamos para la misma empresa de software en proyectos similares, con diferente experiencia tecnológica. Creemos tener conocimiento para compartir con la comunidad de desarrolladores. Sabemos que tenemos un largo camino y mucho por aprender en nuestras carreras, así que vamos a documentar aquí el conocimiento que ya tenemos y el que obtengamos.

Nuestro Enfoque

Tenemos experiencia en tecnologías como .Net y Java, así que nos enfocaremos más en estos temas. Aun así, hablaremos sobre Patrones de Diseño, mejores prácticas y diseño grafico.

Nuestra Meta

Queremos proveer de tips útiles y prácticos que ayuden a los desarrolladores en sus retos diarios. También queremos compartir algunas herramientas desarrolladas por nosotros, estas estarán disponibles para su descarga gratuita.

Nuestro Lenguaje

Escribiremos este blog en ingles (principalmente), pero nuestro idioma nativo es el español. Tomamos la decisión ya que queremos mejorar nuestras habilidades de escritura en ingles y porque consideramos que todo desarrollador debe de tener un buen nivel de entendimiento con este lenguaje. Por otra parte, sabemos que no hay mucha información en español; es por esto que intentaremos traducir algunos de los posts al español, de esta manera las personas que no hablen ingles se podrán ver beneficiadas con la información aquí contenida.

Así que, aquí estamos. Esperamos que encuentren este blog útil.

Saludos,

Wednesday, April 15, 2009

Hello, World!

Welcome to AlienPeople!

We are three Developers working at the same software company in similar projects and with different technological background. We believe that we have some good knowledge to share with the Development Community. We know there's still a long way in our careers and a lot to learn, so we are going to document here the knowledge we already have and the knowledge we will acquire.

Our Scope

We have background in .Net and Java technologies, so we will focus more on these topics. However, we are going to talk about Design Patterns, Best Practices and Graphics Design, too.

Our Goal

We want to provide useful and practical tips that will help the developers on their daily challenges. But we also want to share some tools developed by ourselves that everybody can download for free and use frequently.

Our Language.

We will write this Blog in English, however our native language is Spanish. We took this decision because we want to improve our skills in English writing and because we consider that any developer should have good understanding of this language. On the other side, we know there is not too much information out there in Spanish; that's why we are going to try to translate some of our posts to Spanish, so non-English speakers can be benefit with our tips and tools.


So here we are. We hope you find this Blog useful.
Thanks for reading!